


Introduction
Arduino has always been known for its user-friendly microcontrollers and versatility. Their latest addition, the Arduino UNO WiFi REV2, is no exception. In this article, we will explore the various features of this upgraded board and discuss why it is a great choice for both beginners and experienced makers.
The Evolution of Arduino UNO: From R3 to R4
Arduino UNO is a popular choice for electronic enthusiasts and programmers. With its versatility and ease of use, it has become a go-to platform for prototyping hardware projects. In this article, we will explore the evolution of Arduino UNO from the R3 to the R4 version and discuss the small differences that might impact those using Arduinos or coding for the first time.
The Familiar R3
The Arduino UNO R3 was released in 2011 and was based on the Atmega328p, an 8-bit microcontroller by Atmel. At that time, it was considered a reliable component. However, by today’s standards, it can be considered quite outdated. In fact, the manufacturer does not recommend it for new projects. The R3 operates on a 5V power supply and uses this voltage for both digital communication and as a reference for analog conversions.
Standardized Form Factor
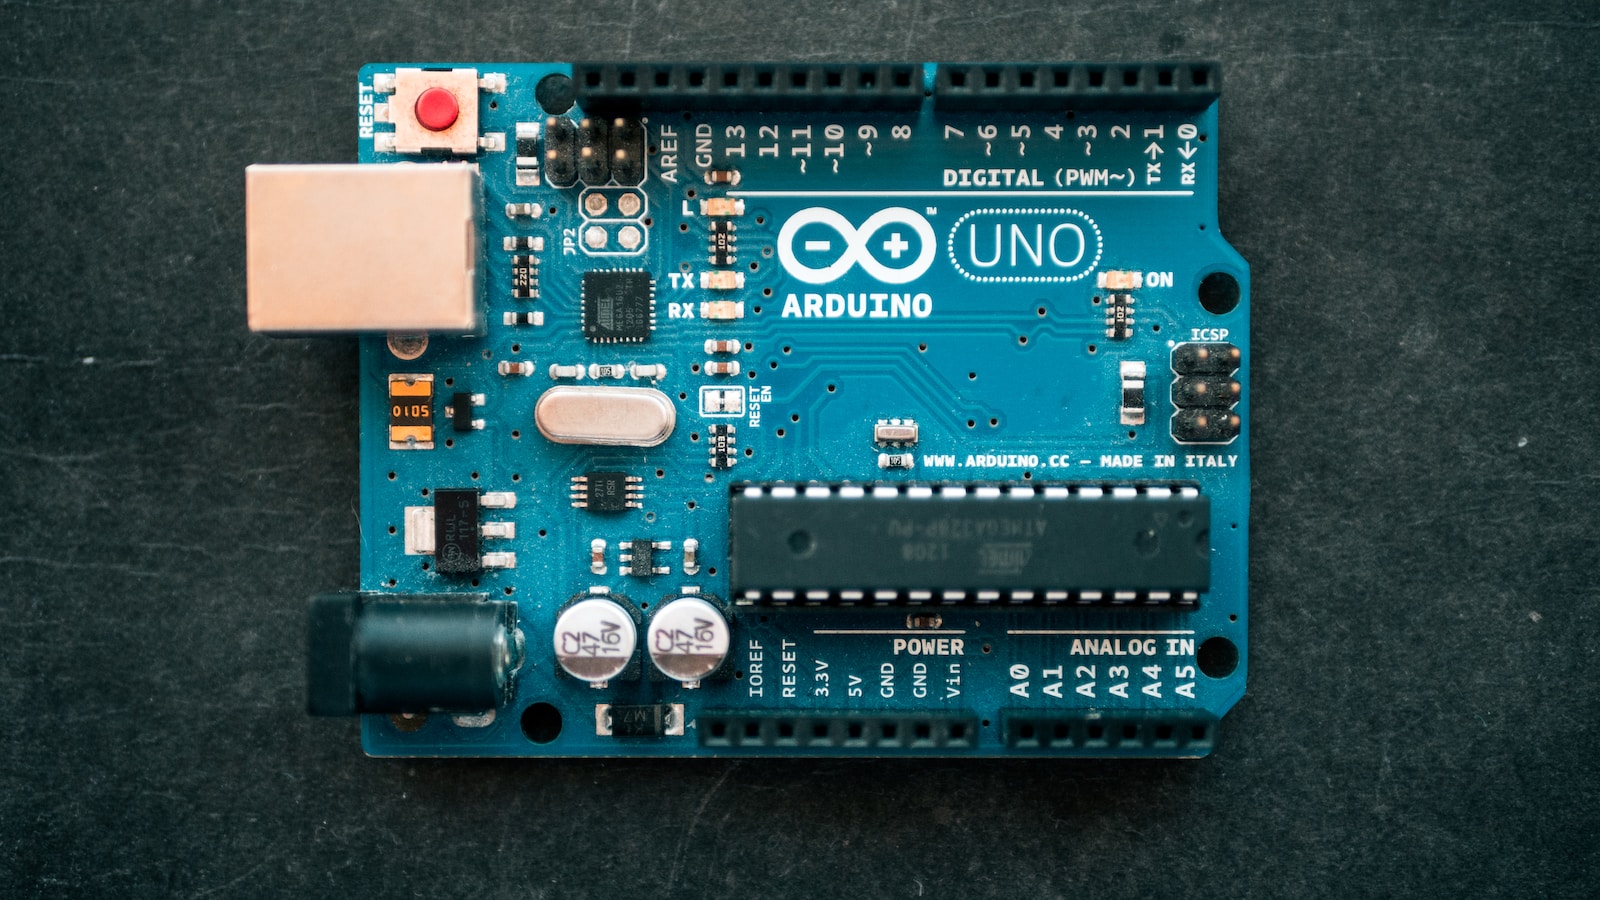
One of the key features introduced by the Arduino UNO was its standardized form factor. This form factor provided a consistent layout that became the basis for a wide range of shields – add-on boards that extend the functionalities of the Arduino. However, this form factor has been a source of frustration for some makers. The pins are not regularly spaced, which means that a basic prototyping board cannot be used to create a DIY shield. Despite this drawback, the Arduino UNO R3 offers 14 digital IO pins and six analog inputs, providing sufficient flexibility for most projects.
The Arrival of R4
The latest iteration of the Arduino UNO is the R4 version, which comes in two variants: the Arduino UNO R4 Minima and the Arduino UNO R4 WiFi. These new versions bring several improvements over the R3. For educational purposes, it is important to note that the changes are not drastic but can still make a difference for beginners.
What to Expect with R4
The biggest change in the Arduino UNO R4 is the use of the ATmega4809 microcontroller, which is an 8-bit AVR-based microcontroller. This microcontroller offers improved performance and more memory, which can be beneficial for complex projects. Additionally, the R4 versions have an increased number of digital IO pins, providing greater flexibility and expandability.
Another notable change in the R4 versions is the use of a USB-C connector for programming and power supply. This brings the UNO in line with modern standards and allows for faster data transfer. However, it is important to note that the R4 still supports legacy USB-A connectors, so compatibility with older devices is not an issue.
Educational Perspective
If you are using Arduino UNO for educational purposes, it is important to consider these changes. While the R4 versions may offer improved performance, memory, and connectivity, they still maintain backward compatibility with existing projects. As an educator, you may need to familiarize yourself with the changes and guide your students accordingly.
The New Arduino UNO R4 Minima: A Closer Look
Arduino, the open-source electronic prototyping platform, has been a favorite among hobbyists, engineers, and makers for many years. With its user-friendly design and affordable price, Arduino has made it easier for anyone to create their own electronic projects. In this article, we will take a closer look at the latest addition to the Arduino family, the UNO R4 Minima.
Upgraded Features
One of the first noticeable changes in the UNO R4 Minima is the new microcontroller. It now features the Renesas R7FA4M1AB3CFM, a 32-bit ARM Cortex M4. This upgrade provides significant improvements in terms of speed, RAM, and storage capacity. With this new microcontroller, users can expect faster processing and handling of more complex tasks.
Familiar Design
Despite the upgraded internals, the UNO R4 Minima retains the familiar design that Arduino users have come to know and love. It still features two rows of female headers, neatly labeled for analog and digital pins. This continuity allows users to seamlessly transition from previous Arduino models to the new R4 Minima, without having to learn a completely new layout.
Increased Compatibility
The UNO R4 Minima maintains compatibility with its predecessors in terms of programming options. It can still be connected to a computer via a USB type B connector, allowing for easy communication and programming. Additionally, it can also be programmed via an ICSP connector, providing flexibility for advanced users who prefer this method.
Cost and Availability
The Arduino UNO R4 Minima is currently priced at $18 on the official Arduino store. Compared to previous models, this is a reasonable price considering the upgraded features and improved performance. However, for those looking for even more affordable options, there are numerous clones available online for a fraction of the price.
Exploring the New Features of the Arduino UNO R4
The Arduino UNO R4, the latest iteration of the popular microcontroller board, brings with it some exciting new features. In this article, we will delve into the differences between the R3 and R4 versions of the board, focusing on the addition of a USB C connector and the implications it has on USB communication and debugging.
USB C Connector – A Game Changer?
One of the most significant updates in the Arduino UNO R4 is the introduction of a USB C connector. This new connector brings the board up to speed with the latest USB technology, allowing for faster and more efficient communication between the Arduino and a computer. With USB 2.0 compatibility, users can now enjoy full-speed data transfer, enabling the creation of HID projects where the Arduino can mimic the behavior of a keyboard or a mouse. This opens up new possibilities for interactive and user-friendly applications.
A Potential Debugging Challenge
While the USB C connector offers several advantages, it also presents a potential challenge when it comes to debugging and reprogramming the Arduino. Unlike its predecessor, the R4 does not feature a companion chip that handles USB communication. Instead, the new microcontroller directly manages the USB communication.
This means that if your code causes the microcontroller to crash, debugging or reprogramming the Arduino becomes more challenging. In the R3, even if the code was poorly written, the redundant chip would continue to function. However, there is a specific bootloader mode that can be activated by double-clicking the RESET button, providing a way to reprogram a crashed Arduino. Unfortunately, this method is not widely known and may not be well-documented, posing a potential issue for less experienced users.
Serial Port and Blinking LEDs
With the introduction of the R4, there is now a reliance on the Serial port for communication. While this may not pose a significant problem for experienced users, beginners may struggle with waiting for the Serial port to respond.
Additionally, the R4 replaces the secondary chip, responsible for handling communication between the computer and the UNO, with two GPIOs on the RA4. These GPIOs control the blinking LEDs that indicate communication activity. While this change may seem minor, many makers have come to rely on the reliable behavior of the previous chip. The shift to the GPIOs may prove to be a learning curve for those accustomed to using the LED indicators to troubleshoot their projects.
The Confusion of Using Multiple Serial Ports
When I first discovered that the Arduino UNO had the capability to handle two separate Serial ports, I was pretty confused. This was because the LED lights were not blinking when programming the chip or using the serial monitor. To add to the confusion, the UNO has a separate Serial port located on D0 and D1, in addition to the one used on the USB port. It’s even cooler that you can select which port to read or write to by using Serial or Serial1. However, this new feature may prove to be confusing for beginners and potentially break previous tutorials or projects.
The Frustration of Hardware Debugging
I was thrilled when I learned that there is finally a way to hardware debug an Arduino UNO. Unfortunately, this debugging process does not use the Arduino IDE directly. Instead, the UNO now includes a standard SWD debug port that can be used to debug the board. However, this may cause frustration for beginners who don’t have the necessary hardware lying around. Despite this inconvenience, the addition of a debugger is still a valuable and important improvement to the UNO.
The Enhancement of Analog Inputs
One aspect that piqued my curiosity was the implementation of the Arduino UNO’s analog inputs. The ADC (Analog to Digital Converter) has been upgraded to a 14-bit resolution, compared to the previous version’s 10-bit resolution. I was impressed to see how Arduino managed to implement this enhancement without breaking previous code or tutorials. Their solution is clever and ensures compatibility while providing better precision for analog measurements.
The Arduino UNO has introduced several notable improvements that come with their own set of challenges. The addition of multiple Serial ports allows for more flexibility in data transfer, but may confuse beginners and require adjustments to existing projects. The inclusion of a hardware debug port is a great step forward, although it may be frustrating for those without the necessary hardware. Finally, the upgrade to a 14-bit ADC enhances analog measurements while maintaining compatibility with previous code. Overall, these changes demonstrate Arduino’s commitment to advancing their platform and pushing the boundaries of what can be accomplished with the UNO.
The Increased Resolution of the ADC
The Arduino ADC (Analog to Digital Converter) has always had a resolution of 10 bits. This means that it could represent analog values with a range of 0 to 1023. However, with the introduction of the analogReadResolution function, you can now increase the resolution up to 14 bits. This allows for a much more precise reading of analog values.
Shifting of Values with Higher Resolution
While it is exciting to have the ability to increase the ADC resolution, it is important to note that using a higher resolution on previous versions of the Arduino UNO will simply result in shifted values. This means that although you will still get the same range of values, the resolution will be lower. So, if you are using an older version, it is advisable to stick with the default 10-bit resolution.
The Confusion of Analog Output
For the first time on an Arduino UNO, there is now an analog output available. This analog output, also known as DAC (Digital to Analog Conversion), is located on pin A0. However, it is important to note that this pin is still labeled as an analog input. In the past, official boards with a DAC would clearly label the pins as outputs. This can be confusing for beginners and those who are following tutorials for the first time.
Using analogWrite for DAC Output
To utilize the analog output on the Arduino UNO, you can use the analogWrite function. Interestingly, analogWrite was previously used to output a PWM (Pulse Width Modulation) signal on a digital pin. This change in functionality can further add confusion for beginners. It is worth noting that the Arduino UNO only has one channel for analog output, which may limit certain applications.
Expanded Options for PWM Signals
In relation to analogWrite and PWM signals, there is an interesting development on the Arduino UNO R4. While traditionally only pins with a small wave symbol could be used for PWM output, the R4 version allows for PWM functionality on all pins. However, it is important to mention that Arduino does not officially support this feature and there is a risk of breaking things. So, if you are a teacher or a beginner, it is advisable to adhere to the officially supported pins for PWM output.
Mapping of Ports on the R3 Version
In the R3 version of the Arduino UNO, the port mapping was done in a straightforward manner. The digital pins were mapped directly and in the same order as the outputs. This made it easier for users to understand the pin configuration and design their projects accordingly.
The R4: Not the Same Pinout
One of the disappointments with the R4 version of the Arduino UNO is that the pinout is not the same as the previous version, R3. This means that some of the projects you may have worked on with the R3 will need to be modified for the R4. It’s important to keep this in mind when using different versions of the Arduino UNO.
Improved Power Port
On a positive note, the R4 version of the Arduino UNO has an improved power port. The R3 version only accepted voltages between 7 and 12V, which could be limiting for certain projects. However, the R4 now accepts voltages between 6 and 24V, making it much easier to power your board, especially if you’re using components like 24V LEDs. Additionally, the R4 uses a switching power supply, resulting in more efficient voltage conversion.
Reduced Output Current
One downside of upgrading to the R4 is that the total output current is lower compared to the previous chip. On the Arduino UNO R3, each pin could output up to 40mA, with a total of 200mA for the entire board. However, with the R4, the output is reduced to 8mA per pin and a total of 60mA for the entire board. This should not be an issue for basic LED projects, but it’s important to take note of this if you’re using more demanding sensors or actuators.
The Arduino UNO R4 WiFi
Another version of the Arduino UNO that has gained a lot of attention is the Arduino UNO R4 WiFi. This version costs $25 on the official store and offers some additional features compared to the standard R4. One notable addition is the inclusion of an ESP32, which acts as both a Wi-Fi module and a microcontroller.
Included LED Matrix
Another exciting feature of the Arduino UNO R4 WiFi is the inclusion of an LED matrix. This allows for more advanced visual displays and opens up new possibilities for creative projects. The LED matrix can be controlled and programmed using the ESP32, making it a powerful tool for creating dynamic and interactive projects.
While the R4 version of the Arduino UNO may have some changes in its pinout and reduced output current, it also offers improvements such as an expanded range for power input and additional features like a built-in Wi-Fi module and LED matrix. These updates provide new opportunities for innovation and creativity in the world of Arduino programming and electronics.
ESP32: A Powerful Network Co-Processor
The Arduino UNO WiFi REV2 is equipped with ESP32, a popular microcontroller that is widely used in many projects. The ESP32 serves as a network co-processor, similar to the coprocessor on the R3. This allows for seamless communication and networking capabilities, making it easier to connect your projects to the internet.
USB Controller and Serial Communication
One of the notable features of the Arduino UNO WiFi REV2 is its USB controller. Acting as both a USB controller and a programmer-debugger, it enables the forwarding of Serial communication. This feature allows you to easily program and debug your projects without any additional equipment or hassle.
12×8 LED Matrix: Adding Visual Appeal
Another exciting addition to the Arduino UNO WiFi REV2 is the 12×8 red LED matrix. This matrix provides a visually appealing way to display messages or animations directly on the board. Arduino even provides example code that allows you to draw in real time on the LED matrix from your browser, making it a great educational tool for workshops or projects involving pixel art.
Qwiic Connector: Easy Sensor Integration
The Arduino UNO WiFi REV2 also includes a Qwiic connector, sometimes referred to as Stemma QT in the Adafruit world. This connector allows you to easily plug in an I2C sensor without the need for any soldering. This feature is particularly useful for beginners who may not have experience with soldering or want a quick and hassle-free way to integrate sensors into their projects.
A Closer Look at the Qwiic Connector
The Qwiic connector is becoming increasingly popular among electronic enthusiasts and makers. It offers a convenient way to connect sensors and other electronic components without the hassle of soldering or dealing with messy wires. In this article, we will explore some interesting features of the Qwiic connector and discuss its potential benefits and limitations.
The Advantage of Using Wire1
One notable feature of the Qwiic connector is that it uses a second I2C peripheral called Wire1, instead of the standard Wire. This allows for better compatibility and flexibility when working with multiple I2C devices. By using Wire1, you can easily connect more sensors and devices to your project without running into conflicts or communication issues.
Built-in Power Supply and Logic Conversion
Unlike other connectors, the Qwiic standard takes care of both power supply and logic level conversion behind the scenes. This means that you don’t have to worry about matching the voltage levels of your microcontroller and peripheral devices. The Qwiic connector handles all the necessary conversions, making it simpler and safer to work with different components.
The RTC Feature for Real-Time Clock
An exciting addition to the Qwiic boards is the Real-Time Clock (RTC) feature, which allows you to keep track of time. This is particularly useful for projects that require accurate timing or scheduling. The WiFi version of the Qwiic board provides three new pins for RTC functionality: GND for grounding, VRTC for low-power operation, and OFF for power supply control.
Limitations and Compatibility
It’s important to note that the RTC feature on the Qwiic boards may not work if you are using the USB port to power your Arduino. This means that if you rely on a power bank as your power source, you won’t be able to utilize the RTC functionality. While this limitation may be disappointing for some, it’s still a valuable addition for low-power projects that can make use of the RTC feature.
Comparing Qwiic Boards and Minima
One interesting question that arises is why the RTC feature and other additions are not present in the Minima boards, which also include an RTC. This discrepancy raises curiosity among users who may prefer the Qwiic connector’s additional features. However, it’s important to remember that different boards cater to different needs and preferences, and the absence of certain features does not necessarily diminish the quality or usefulness of a particular board.
No SWD Port on R4 WiFi
Another notable aspect of the Qwiic R4 WiFi board is the absence of a Serial Wire Debug (SWD) port. This is due to the fact that the ESP32 microcontroller, used in the Qwiic R4 WiFi, can be directly used as a debugger. While many users may have expected to use the new IDE to debug the board, this feature is currently not available. It is possible that future updates may include debugging capabilities for the Qwiic R4 WiFi.
Error Reporting with ESP32
Interestingly, the ESP32 microcontroller already has some built-in error reporting functionality. This was discovered online, prompting some developers
The Minima: A Potential Issue for Programmers
The Minima is an Arduino board that presents a unique challenge for programmers. Unlike its counterparts, this board does not function in the same way when running programs. It is worth noting that my program did not crash in the same manner on the Minima as it did on the Arduino UNO R3. While the UNO R3 would print nonsensical outputs due to outdated memory management, the Minima had a different response altogether.
Compatibility Issues with Arduino UNO R4 WiFi
The Arduino UNO R4 WiFi is eagerly anticipated by many, as it is expected to be compatible with Arduino IoT Cloud. This feature is particularly exciting for non-programmers, as it serves as a valuable teaching tool. However, it is disheartening to learn that support for the UNO R4 WiFi is still pending. Arduino claims that this compatibility will be available “very soon,” leaving users to wonder about the timeline for this release.
New Arduino Boards Offer More Modern Features
As a maker, I am thrilled to see the introduction of new low-cost official Arduino boards. These boards boast an array of modern features that enhance the prototyping experience. The ability to achieve higher speed and greater memory, along with the inclusion of a debug interface, Wi-Fi, Bluetooth, and a compact screen, is undeniably beneficial. While some may argue that these boards are suitable for prototyping, it is important to note that alternatives like ESP32 or Raspberry Pi RP2040 boards are available at incredibly low prices.
The Future of Arduino UNO R3 and R4
At present, the UNO R3 is not being discontinued, and Arduino assures users that it will continue to be available. However, it is unclear whether the end goal is to eventually replace the R3 with the R4. This uncertainty has raised concerns among many users, who believe that referring to both boards as UNO can lead to significant confusion. It remains to be seen how the community will respond to these new developments. Are these new boards an exciting upgrade, or will they merely invite more confusion? Share your thoughts in the comments below.
The Importance of Subscribing to a YouTube Channel
YouTube has become one of the most popular platforms for entertainment and information nowadays. With millions of videos being uploaded daily, it can sometimes be overwhelming to find quality content that suits our interests. However, one way to ensure that we never miss out on our favorite videos or channels is by subscribing to them. Subscribing to a YouTube channel not only benefits the creator but also the viewer. In this article, we will explore the importance of subscribing to a YouTube channel and how it can enhance your overall YouTube experience.
Staying Updated with New Content
By subscribing to a YouTube channel, you are guaranteed to stay updated with the latest videos from your favorite creators. YouTube’s algorithm prioritizes content from channels you have subscribed to, ensuring that you never miss out on a new upload. This feature saves you the hassle of constantly searching for new videos or relying on notifications alone. Simply browsing through your subscriptions feed will provide you with a curated list of content tailored to your interests.
Supporting Your Favorite Creators
Subscribing to a YouTube channel is not just a passive action; it is a way of showing support to your favorite creators. Behind every video, there is a dedicated content creator who puts in their time, effort, and creativity. By subscribing, you are acknowledging their hard work and encouraging them to continue producing content that you enjoy. Additionally, the more subscribers a channel has, the more recognition it receives, leading to potential collaborations, sponsorships, and growth opportunities for the creator.
Building a YouTube Community
The beauty of YouTube lies in its vast and diverse community. Subscribing to a channel allows you to become a part of that community. By engaging with the content, leaving comments, and interacting with other subscribers, you join a network of like-minded individuals who share similar interests. These communities foster discussions, collaborations, and even friendships. Subscribing to a channel is not merely about consuming video content but also about becoming an active participant in a larger online community.
Personalized Recommendations
YouTube’s recommendation algorithm is designed to suggest videos based on your viewing history and subscriptions. The more channels you subscribe to, the better YouTube understands your preferences, resulting in more accurate recommendations. By subscribing to a variety of channels, you expose yourself to different genres, topics, and perspectives. This diversity creates a well-rounded YouTube experience, broaden your horizons, and introduce you to content you may have never discovered otherwise.
The Arduino UNO R4 brings subtle but significant improvements over its predecessor, the R3. With a more powerful microcontroller, increased digital IO pins, and a modern USB-C connector, the R4 versions provide a more efficient and user-friendly experience. Whether you are a beginner
The release of the Arduino UNO R4 Minima brings exciting improvements to the popular Arduino platform. With its upgraded microcontroller, familiar design, increased compatibility, and affordable price, it is sure to attract both beginners and experienced users alike. Whether you’re a hobbyist or a professional, the UNO R4 Minima is definitely worth considering for your next electronic project.
The Arduino UNO R4 brings several new features and improvements to the table. The inclusion of a USB C connector allows for faster and more efficient USB communication, opening up a world of possibilities for HID projects. However, the lack of a companion chip and the reliance on the microcontroller for USB communication could pose challenges in terms of debugging and reprogramming for less experienced users. Additionally, the shift to using the Serial port and the change in the behavior of the blinking LEDs may require some adjustment for makers who heavily relied on them in the past. Overall, the Arduino UNO R4 presents exciting opportunities while also necessitating some adaptation from its users.
Overall, the Arduino UNO WiFi REV2 is a fantastic board that combines the power of ESP32 with the versatility and user-friendly nature of Arduino. Its USB controller, LED matrix, and Qwiic connector make it a great choice for both beginners and experienced makers alike. Whether you’re just starting out or looking to upgrade your projects with advanced features, the Arduino UNO WiFi REV2 is definitely worth considering.
In summary, subscribing to a YouTube channel is not only a way to stay updated with your favorite videos but also a means of supporting creators, building communities, and enjoying a personalized YouTube experience. So, the next time you come across a YouTube channel that resonates with you, don’t hesitate to hit that subscribe button and become a part of something bigger!


