


Pressure Sensor – Arduino
Introduction
When working with a pressure transducer and an Arduino, it is crucial to know how to effectively interface the two devices. This article will guide you through the process, explaining the necessary connections and providing step-by-step instructions.
Using Industrial Sensors in Automotive Applications
Industrial sensors are widely used in various applications, including automotive environments. These sensors are designed to withstand the harsh conditions of industrial settings and provide accurate measurements. In this article, we will explore the possibility of using industrial sensors in automotive applications and how they can be interfaced with microcontrollers to display real-time data.
Choosing the Right Sensor for Automotive Applications
When selecting a sensor for automotive applications, it is important to consider factors such as the type of measurement needed, the operating temperature range, and the environmental conditions. For example, if you want to measure oil pressure, air pressure, or fuel pressure in your engine, you need a sensor that can handle the specific requirements of these applications.
Interfacing the Sensor with a Microcontroller
To interface the industrial sensor with a microcontroller, such as an Arduino, you will need to establish a communication link between the two. One common method is to use the I2C (Inter-Integrated Circuit) communication bus. This allows for efficient transmission of data between the sensor and the microcontroller.
Displaying Real-Time Data on an LCD Screen
Once the sensor data is received by the microcontroller, it can be displayed on an LCD screen. In this case, we recommend using a 4×20 LCD screen over the I2C communication bus. However, if you prefer a smaller display, such as a 2×16 screen, you can use backpacks that can be attached to the back of the screen to enable I2C communication.
Recommended Components for Your Projects
If you are interested in using industrial sensors and microcontrollers for your automotive projects, you can easily find the necessary components on online platforms like Amazon. Some of the recommended components include pressure transducers, LCD displays, breadboards, and Arduino kits. We have provided links below for your convenience.
Industrial sensors can be effectively utilized in automotive applications to measure various parameters. By interfacing these sensors with microcontrollers and using LCD screens, real-time data can be displayed in a user-friendly manner. If you are interested in exploring this field further, consider getting the recommended components and start your own projects.
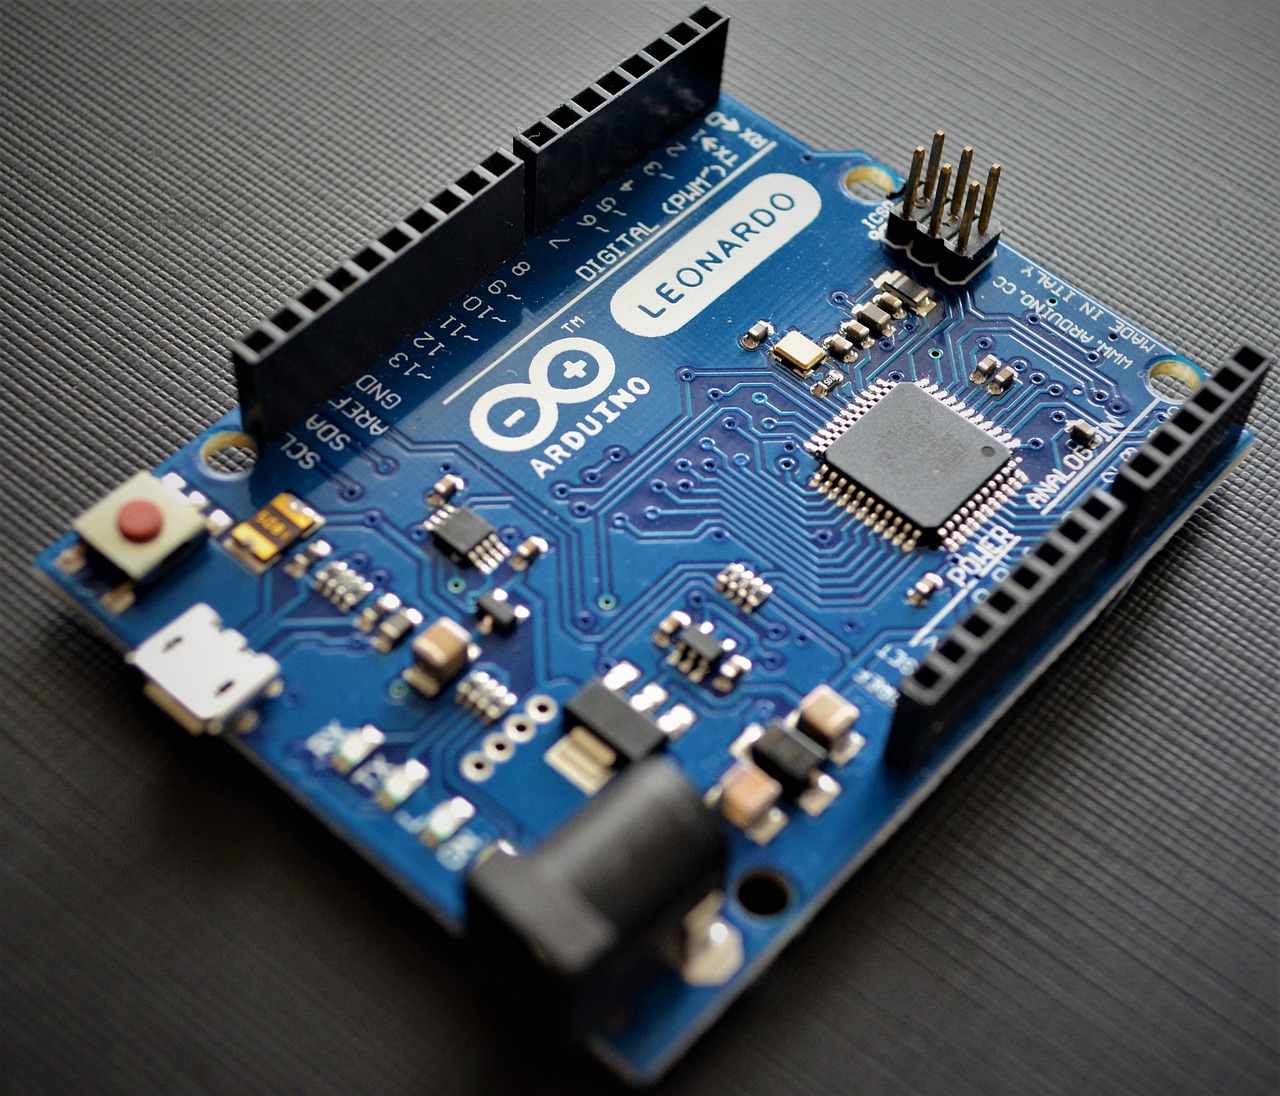
How to Interface a Pressure Transducer with an Arduino
Using IC for Easy Interface
To interface the pressure transducer with the Arduino, you can leverage the simplicity of the IC (Inter-Integrated Circuit) protocol. Unlike other methods that require multiple pins, the IC interface only requires four pins. This simplifies the connection process and makes it easier to integrate the devices seamlessly.
The Required Pins
The four pins you need to interface the pressure transducer with the Arduino are ground, five volts, data (SDA), and clock (SCL). The ground and five volt pins on the transducer easily connect to the corresponding pins on the Arduino. The clock and data pins are located on the side of the transducer, labeled as SCL and SDA, respectively. These pins will be connected to the SCL and SDA pins on the Arduino.
Connection Overview
By connecting the respective pins, you can establish the interface between the pressure transducer and the Arduino. The positive wire (usually red) on the transducer connects to the five volt pin on the Arduino, the ground wire connects to the ground pin, and the screen wire (usually green) connects to one of the input analog pins on the Arduino.
Interfacing with an LCD Screen
In addition to the pressure transducer, you may also want to interface an LCD screen with the Arduino. To do this, connect the ground pin of the LCD screen to the ground pin on the Arduino. The VCC pin of the screen should be connected to the five volt pin on the Arduino. The SDA and SCL pins on the screen should be connected to the corresponding SDA and SCL pins on the Arduino.
The Importance of Correct Labeling on Arduino
When working with an Arduino, it is crucial to correctly label the pins and inputs to ensure accurate readings and functionality. In this article, we will discuss the significance of proper labeling and explore an example of taking pressure readings using a pressure transducer.
Demonstration Using a Pressure Transducer
Let’s begin with a quick demonstration of using a pressure transducer with an Arduino. By blowing onto the transducer, we can observe the corresponding values on the screen. Additionally, we can test it as a vacuum, although its accuracy in that regard may vary. For this demonstration, we will be utilizing a pressure transducer and an LCD screen, and going through the code line by line. If you’re interested in the code, it will be provided in the description below. Feel free to contact me via email if you have any questions.
Interfacing with the LCD Screen
In order to interface with the LCD screen, we need to include two libraries for I2C communication. These libraries will allow us to communicate with the screen and display our readings accurately.
Defining the Analog Input Pin
To read the pressure transducer values, we need to define the analog input pin in the code. The pressure input can be assigned to any of the available input pins on the Arduino board. In this case, we are using the Arduino Uno.
Pressure Transducer Values
The pressure transducer provides specific values at zero PSI and at full pressure (in this case, 100 PSI) on the analog pins. These values are important to know in order to interpret the readings correctly. By understanding the range of values, we can accurately determine the pressure being applied to the transducer.
The Analog Read Function in the Arduino IDE
The analog read function is an important feature in the Arduino IDE that allows users to read analog voltage values from input pins. This article will explain how the function works and its practical implications.
Converting Analog Voltage to Digital Values
When using the analog read function, you simply need to write “analogRead()” followed by the desired pin number in the brackets. This function takes the analog voltage value from the selected pin and converts it to a digital number between 0 and 1023. This means that there are 1024 possible values that can be converted from a voltage input.
Understanding Conversion Equations
To demonstrate the conversion process, let’s consider an example using a pressure transducer. On Amazon, there is a specification sheet stating that at 0.5 volts, the pressure transducer reads zero psi, and at 4.5 volts, it reads 100 psi. We can use a simple equation to calculate the analog input integer for these values.
By setting up the equation x/1024 = 0.5/5, where x represents the analog value, we can calculate the value at 0.5 volts. Solving this equation, we find that x 102.4. Therefore, at 0 psi, the analog input integer would be approximately 102.4.
Similarly, we can calculate the value at 4.5 volts using the equation x/1024 = 4.5/5. By solving this equation, we find that x 921.6. Thus, at 100 psi, the analog input integer would be approximately 921.6.
Practical Application
Understanding the analog read function and the conversion equations allows us to use Arduino to measure and interpret different analog signals. In the case of the pressure transducer example, we can now determine the analog input integer corresponding to specific pressure values.
By using the analog read function, we can read the voltage from the pressure transducer and convert it to the appropriate analog input integer. This enables us to accurately measure pressures within the 0-100 psi range using Arduino.
The Importance of Converting Analog Values into Voltage
In various electronic applications, it is often necessary to convert analog values into voltage for accurate data analysis. This process is crucial in obtaining precise measurements and ensuring the functionality of the overall system. In this article, we will explore the steps involved in converting analog values into voltage and the significance it holds in the field of electronics.
Converting Analog Values into Voltage
To convert analog values into voltage, a simple equation is utilized. This equation incorporates the constant integer and the analog value obtained from the transducer. By multiplying the analog value with the constant integer, the corresponding voltage value can be derived. This conversion process enables electronic systems to interpret and analyze data in a more meaningful way.
Defining the Constant Integer
In order to accurately convert analog values into voltage, it is essential to define the constant integer known as the pressure transducer max PSI. This value depends on the specific transducer being used and should be inputted accordingly. For instance, if a transducer with a maximum PSI of 100 is being used, the constant integer should be set to 100. This allows for flexibility when working with different transducers, as the value can be easily changed.
Setting Baud Rate and Censor Read Delay
Two important parameters to consider when converting analog values into voltage are the baud rate and censor read delay. The baud rate determines the rate at which data is transmitted between devices, and it should be set to a value compatible with the serial monitor. Additionally, the censor read delay introduces a brief pause between reading the values and displaying them on the screen. This delay improves readability and ensures a smoother data analysis process.
Using Floating Points for Pressure Values
To accurately read and store the converted voltage values, floating points are used. By utilizing the float data type, which supports decimal numbers, the pressure values can be stored with greater precision. This enables more accurate analysis of the converted voltage values and ensures that the system functions optimally.
Initializing the LCD Screen
Lastly, the initialization of the LCD screen is crucial for displaying the converted voltage values. The liquid crystal (LCD) underscore i2c is responsible for initializing the screen and ensuring its proper functionality. This step is essential in creating a user-friendly interface and enabling easy interpretation of the converted voltage values.
Understanding LCD Screen Communication
LCD (Liquid Crystal Display) screens are commonly used in various electronic devices for displaying information. In order to communicate with an LCD screen, a specific format and address must be used. This article will explain the process of LCD screen communication and provide an example for better understanding.
Finding the Address of Your LCD Screen
Each LCD screen may have a different address for communication. To determine the address of your LCD screen, there is a sketch that can be run. The address is typically written in a format like “0x3F”. This address is specific to IC (Inter-Integrated Circuit) communication, but it may vary for different screens.
Specifying the Number of Columns and Rows
Apart from the address, it is also important to specify the number of columns and rows on the LCD screen. This information is essential for the proper functioning of the screen. The number of columns and rows can be found in the specifications of the LCD screen or by referring to the product manual.
Initializing the LCD Screen
In the code, there is a section called “void setup” which is a routine that runs once when the system turns on or is reset. In this section, the necessary initializations are performed. One important initialization step is to start the serial communication using the “serial.begin” function, which specifies the baud rate.
Setting Up the Loop
After the initialization, the code enters the “loop” portion, which runs repeatedly. Within this loop, various operations can be performed. In the given example, the code reads the pressure value from an input pin using the “analog.read” function. The pressure value is then stored in a variable called “pressure value”.
Converting Pressure to PSI
To convert the pressure value into PSI (Pounds per Square Inch), a conversion equation is used. The exact equation may vary depending on the specific application and sensor being used. By applying the appropriate conversion equation, the pressure value can be transformed into the desired unit of measurement.
Validating the Conversion
To ensure the accuracy of the conversion, the code can be uploaded to an Arduino board and tested with real data. By providing different pressure values, one can verify whether the resulting values make sense according to the conversion equation. This step is important to confirm that the LCD screen is displaying accurate and meaningful information.
Understanding LCD screen communication is crucial for interacting with these display devices effectively. By following the correct format, addressing the screen properly, and implementing the necessary conversions, accurate information can be displayed on an LCD screen.
Understanding Analog Reading and Conversion Equations
Analog readings are an essential part of many electronic devices and sensors. In this article, we will explore the concept of analog reading and discuss the conversion equation used to relate the voltage reading to meaningful units such as pressure or temperature.
Analog Reading Explained
Analog reading refers to the measurement of voltage levels within a certain range. In the case of sensors, such as pressure transducers, these voltage levels can be translated into physical quantities like pressure. The analog reading is usually taken by an analog-to-digital converter (ADC), which converts the continuous analog voltage signal to a discrete digital value.
The Challenge of Accuracy
In the text provided, the author describes their readings without any conversion equation. While the numbers may seem confusing at first, it is important to note that the author is not looking for precise values but rather a general understanding of the pressure being measured. However, to obtain accurate and meaningful measurements, a conversion equation is necessary.
The Conversion Equation
To convert an analog reading into a meaningful unit, such as pressure in psi, a conversion equation is required. The author mentions a specific approach where the lower value does not start at zero but at 102. In this case, the equation would involve subtracting the lower value from the incoming value, multiplying it by the range of the pressure transducer in psi, and dividing it by the total range of the pressure transducer.
Linear vs. Non-Linear Relationships
It is important to note that the conversion equation assumes a linear relationship between the voltage and the physical quantity being measured. This assumption holds if the relationship between voltage and pressure is directly proportional. However, if the relationship is non-linear, the conversion equation would need to be adjusted accordingly.
The Conversion Equation: From Analog Value to PSI
In order to accurately measure pressure using an Arduino, it is important to understand the conversion equation that translates the analog value into PSI (Pounds per Square Inch). This equation allows us to interpret the readings from a pressure transducer and convert them into meaningful pressure values. Let’s break down this equation and explore how it can be validated.
Understanding the Voltage-Pressure Relationship
The first step in understanding the conversion equation is to grasp the relationship between voltage and pressure. At zero volts, the pressure transducer reads zero PSI. However, at 0.5 volts, the transducer detects a pressure of 100 PSI. This implies that there is a linear relationship between voltage and pressure, with a range of 0 to 4.5 volts corresponding to a pressure range of 0 to 100 PSI.
Validating the Conversion Equation
To confirm the accuracy of the conversion equation, one can use a multimeter to measure the voltage output of the pressure transducer. By connecting the multimeter to the analog input pin of the Arduino and grounding it, the voltage reading can be obtained. At zero pressure, the multimeter should display approximately 0.5 volts, which aligns with the equation. This step validates that the equation is correctly converting the analog value into the corresponding PSI value.
Testing the Pressure Transducer
To further verify the accuracy of the conversion equation, it is recommended to perform tests using various pressure values. Although not having the proper adapters at the moment, one could utilize an air compressor with a pressure gauge to apply known pressure values to the transducer. By comparing the measured analog values with the expected PSI values, one can ensure that the conversion equation accurately translates the readings.
Displaying Data on the Serial Monitor and LCD Screen
When working with Arduino projects, it’s often useful to display data on different output devices. In this article, we will explore how to display data simultaneously on both the serial monitor and an LCD screen. Let’s dive in!
Displaying Data on the Serial Monitor
First, let’s take a quick look at how to display data on the serial monitor. To do this, we use the command “Serial.print()” followed by the value we want to display. For example, if we want to display the pressure value, we can use the following code:
Serial.print(“Pressure value: “);
Serial.println(pressureValue, 1);
In the above code snippet, “pressureValue” represents the variable containing the pressure value. By using the “Serial.println()” function, we ensure that the value is displayed on a new line. The “, 1” argument specifies that we want to display the value with one decimal place.
By monitoring the serial monitor, we can observe the pressure values in real-time and make any necessary adjustments.
Displaying Data on the LCD Screen
In addition to the serial monitor, we can also display the data on an LCD screen. To achieve this, we need to utilize the LCD library and appropriate functions.
Lcd.setCursor(0, 0);
Lcd.print(“Pressure: “);
Lcd.print(pressureValue, 1);
Lcd.print(” PSI “);
In the above code snippet, we first use “lcd.setCursor()” function to specify the LCD screen’s position where we want the text to be displayed. Here, we have set it to the first column (0) and the first row (0).
Next, we print the label “Pressure: ” on the LCD screen using “lcd.print()”, followed by the actual pressure value “pressureValue”. Again, we specify the number of decimal places using “, 1”. Finally, we print the label “PSI” after the value.
It’s worth noting that if the pressure value exceeds two digits or goes into the negatives, the LCD screen needs to be cleared before displaying the new value. Otherwise, remnants of the previous value might still be visible. To clear the LCD screen, you can use the “lcd.clear()” function.
An Easy Way to Clear the Screen
Clearing the screen is a common task when working with computers, but sometimes you may only want to clear a specific section of the screen without affecting the entire display. In this article, we will explore a simple method to achieve this.
Understanding the Code
To clear a specific section of the screen, you need to identify the digits that represent the area you wish to clear. Typically, these digits are located right after the “psi” value. Additionally, it is important to set a delay between readings to ensure accurate results.
Examining the Screen
Before implementing the code, take a moment to observe the current state of the screen. This will allow you to compare the before and after effects of the clearing process. By analyzing the screen’s appearance, you can gauge the effectiveness of the code.
Testing the Pressure Transducer
In order to demonstrate the functionality of the pressure transducer, a simple blow test can be conducted. By applying pressure, the transducer should accurately detect and output the corresponding psi value. This information can then be displayed on the screen, providing confirmation of the transducer’s proper functioning.
Future Plans for the Project
While the current implementation serves as a proof of concept, the author intends to expand this project into a larger scale endeavor for their truck. The project aims to create a pre-obd2 computer system for an older Dodge truck, allowing for various sensor inputs such as oil pressure, fuel pressure, and turbo pressure. Additionally, the author plans to monitor the battery voltage using a voltage sensor and regulator.
With future developments and parts yet to arrive, the author is excited to continue exploring this project. Stay tuned for more updates and projects from them in the future.
Thank you for reading and watching!
Upgrading the Arduino System
In my ongoing project, I am finding ways to enhance the functionality of my Arduino computer system. By regulating the incoming voltage, measuring exhaust gas temperatures, and incorporating other small add-ons, I aim to take my Arduino to the next level.
Regulating the Voltage
One of the first steps in upgrading my Arduino system is regulating the incoming voltage. With the ability to adjust the voltage from 12 volts down to 5 volts, I can ensure a stable power supply for the Arduino. This not only helps in preventing any power-related issues but also safeguards the system from potential damage.
Integrating a Thermocouple
In addition to voltage regulation, I am also incorporating a pyro k-type thermocouple into my setup. This thermocouple is specifically designed to measure exhaust gas temperatures. By interfacing the thermocouple with the Arduino, I will be able to monitor and analyze temperature variations in real-time.
Exploring Additional Add-Ons
Aside from the voltage regulator and thermocouple, I have a few other small goodies that I am currently exploring. These additional add-ons will further enhance the capabilities of my Arduino system. While I don’t have all the details at hand, I am excited about the possibilities they offer.
An Ongoing Project
Enhancing my Arduino computer system is an ongoing project for me. With each new addition, I am pushing the boundaries of what my Arduino is capable of. This continuous exploration and experimentation not only serves to expand my knowledge but also helps me unleash the full potential of this amazing technology.
As I continue to dive deeper into the world of Arduino, I hope to share my discoveries and progress with fellow enthusiasts. Together, we can unlock the endless possibilities that this versatile platform has to offer.
Interfacing a pressure transducer with an Arduino may seem intimidating at first, but with the help of the IC protocol, it becomes a straightforward process. By following the instructions provided in this article, you can easily connect the pressure transducer and the Arduino, opening up endless possibilities for monitoring and analyzing pressure data in your projects.
Proper labeling and understanding of input pins are crucial when working with Arduino. By following the guidelines and example provided in this article, you can confidently take pressure readings using a transducer and display the values accurately on an LCD screen. Remember to refer to the code in the description if you need further assistance and feel free to reach out to me via email.
The analog read function in the Arduino IDE is a powerful tool for converting analog voltage values into digital numbers. By understanding the conversion process, users can effectively utilize Arduino to measure and interpret various analog signals, such as pressure readings. Whether for hobbyist projects or more complex applications, this function opens up a world of possibilities for Arduino enthusiasts.
Converting analog values into voltage is a crucial step in the field of electronics. By following the necessary steps and utilizing the appropriate techniques, accurate voltage values can be obtained. This allows for precise data analysis and enables electronic systems to operate effectively. Understanding the importance of converting analog values into voltage is vital for any electronic enthusiast or professional in order to ensure the accuracy of their measurements and achieve optimal system performance.
Understanding analog reading and conversion equations is crucial for obtaining accurate measurements from electronic devices and sensors. By applying the appropriate conversion equation, it is possible to convert voltage readings into meaningful units such as pressure. However, it is essential to consider the linearity of the relationship between voltage and the physical quantity being measured to ensure the accuracy of the conversion.
Understanding the conversion equation is crucial when working with pressure transducers and Arduinos. By recognizing the voltage-pressure relationship and validating the equation’s accuracy, reliable pressure measurements can be obtained. Performing tests to verify the equation under different pressure conditions further assures the precision of the readings. By utilizing this conversion equation, precise pressure measurements can be achieved with an Arduino setup.
Displaying data is a crucial aspect of many Arduino projects. In this article, we have learned how to display data on both the serial monitor and an LCD screen simultaneously. By using the appropriate functions and commands, we can ensure that the data is clearly presented and easily accessible. Good luck with your Arduino projects!


