


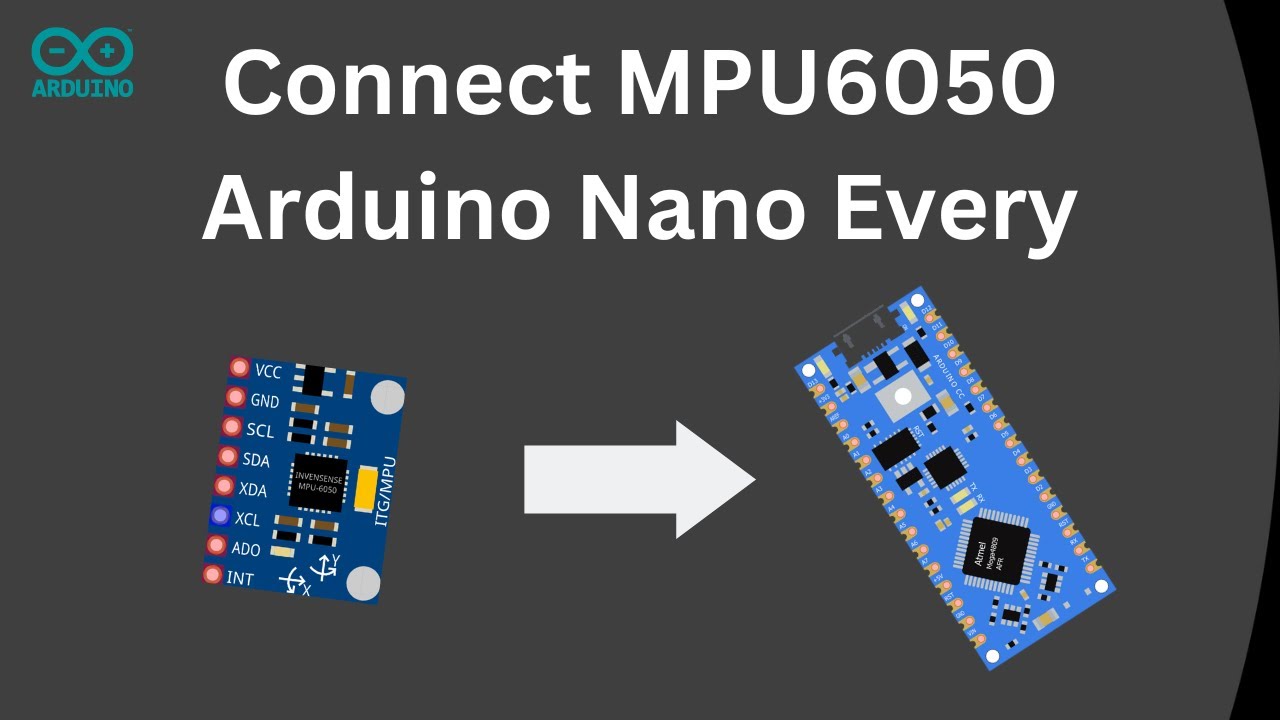
How to Connect MPU6050 to Arduino Nano Every
Its very simple to do and were just going to get started right away here. With this physical connection diagram, so if you have your mpu6050 with soldered headers, all you have to do is simply connect four wires here with i squared C communication with the ground and power here being at the top, so make sure you dont mix those up, or Else you can fry your sensor and of course we have the scl and SDA pens. As you can see here. This is a regular Arduino Nano, but this does also work with the Arduino Nano every because it because it is a flavor of the Arduino Nano. So once you have that in terms of physical connections, lets go into the code setup in the Arduino IDE. Okay, so now were in the Arduino IDE. I would imagine youre familiar with this. If not, you can just download it from the internet and once youre in the Arduino IDE, you want to be able to connect to your Arduino Nano every. In order to do that out, you want to go to the the boards here. The boards manager and you want to install Arduino Mega AVR boards and just install that its fairly quick, and this will allow you to initiate connection with your Arduino Nano every. As you can see there, I want to have that you might have to restart the IDE, and this one goes to the top there and select your Arduino Nano every, which I already did so once you have that you should have communication with the device and what I have here is an example: script from this library that added for mp6050 Library, which is also very easy to get.
We can just go to the library, manager and and Arduino ID and search mpu 6050, and that should be one of the top libraries out of fruit mp6050, which I already downloaded, and you should as well and if thats not showing right away. You may have to restart your IDE and finally, once thats in its really simple to get started with this. If you have your physical connection, as you saw in the previous segment of the video and your device is plugged in what you want to do is simply you can start with a script and they have really great scripts to start getting values right away. And I just did MP MP, 6050 basic reading script, which is the one I have here. Its actually opening again lets just go back to the previous screen, but it will open and then you can just play with a bunch of settings here. This is the whole script, so you can see. We have very simple things to to print to the serial Monitor and we have some initial connections so actually whats interesting with the mb6050 is you can set the certain acceleration ranges and certain gyroscopic ranges depending on your application. So, in this case, with the base application, they have 8gs you can, you can go all the way up to 16 Gs or you can go less the higher you go, the more power its going to use the less accurate its going to be so.
8Gs is a good medium and for gyroscope you can actually go to 200 degrees per second of measurements, and you can also play around with that, and they also have some other code here where theyre filtering the bandwidth I havent played around with that, but its really Nice example script to get this working off the bat and you really dont have to do anything, and you can just customize this to get the values you want. If you dont want the the gyro, you can just delete that and if you dont want acceleration, you can still do that and so on. And, of course, you can add other code and also you can get the temperature out of the MPE, 6050 and fun fact about the temperature on the mp6050 is actually. This is the temperature of the MPV 6050 itself, its not necessarily ambient temperature. So just keep that in mind its not a great measurement of the ambient temperature around the device. So people often get that confused and once you have that everythings good, you can just upload it and make sure you open your serial monitor so just go here and select serial monitor. You may get this little error here. That looks like an error, but its not necessarily an error, and you just want to go to your serial Monitor and it should be um what is going on here, its not connected. Oh, it is upgrading so now its so now its just running, and if you did everything correct, you should be good in terms of your MP 6050 connection.
So let me know what you think in the comment section down below. If this video did help, you please consider like commenting and subscribing to the channel, and also please, if you want to you, can donate to our Channel at buy me a coffee which is linked at my YouTube. Channel thatd be great, and also, if you have any questions, let me know stay tuned guys and thanks for watching, take it easy Music.


