
![ESP-NOW erklärt: Drahtlose IoT-Kommunikation leicht gemacht! | [Tutorial] | #EdisTechlab](https://www.arduino.coach/wp-content/uploads/2024/05/maxresdefault-24-300x169.jpg "ESP-NOW erklärt: Drahtlose IoT-Kommunikation leicht gemacht! | [Tutorial] | #EdisTechlab")


What is Arduino?
Arduino is a microcontroller used to control devices and make decisions based on a program downloaded from a computer. It is capable of interacting with the physical world through sensors and actors.
Materials Needed
To program an LED with Arduino, the following materials are needed: bridgeboard Arduino, LED, computer, USB cable, and jumper wires.
Step One: Create the Code
The first step is to open the Arduino program on the computer and create the code that will be used to control the LED. This code will determine when the LED will be turned on or off.
Step Two: Upload the Code
Once the code is ready, it needs to be uploaded to the Arduino using the USB cable. This will allow the Arduino to execute the code.
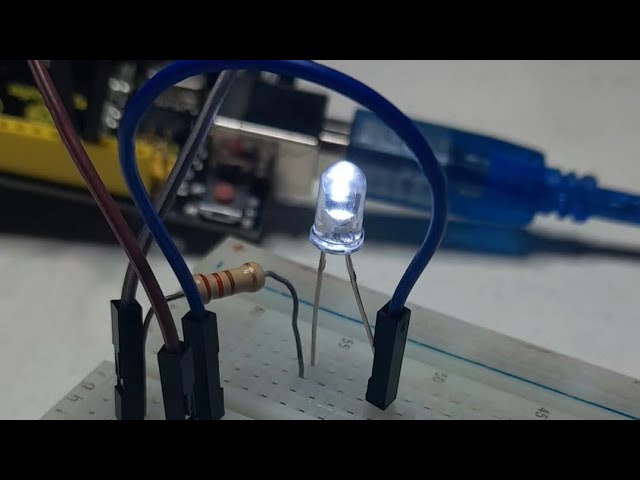
Step Three: Assemble the Circuit
The next step is to assemble the circuit on the bridgeboard. This involves placing the LED in the correct position on the board and connecting the jumper wires to the pins on the Arduino. This will allow the circuit to be powered.
Step Four: Test the Circuit
The final step is to test the circuit. This can be done by running the code and observing the LED to see if it is turning on and off as expected.
This concludes the tutorial on how to program an LED with Arduino. With the right materials and a bit of patience, anyone can program an LED with Arduino.


![ESP-NOW erklärt: Drahtlose IoT-Kommunikation leicht gemacht! | [Tutorial] | #EdisTechlab](https://www.arduino.coach/wp-content/uploads/2024/05/maxresdefault-24-450x253.jpg "ESP-NOW erklärt: Drahtlose IoT-Kommunikation leicht gemacht! | [Tutorial] | #EdisTechlab")

