


Introduction
Arduino has released a new model, the Arduino Nano ESP32, which not only includes the ESP32 MCU but also features an RGB LED. In this article, we will explore the capabilities of this development board and test its speed and usability.
Foreign Arduino boards have always been very easy to install and use, and this one is no exception. Documentation for this board is great on the Arduino site. There is lots of useful information like setup guide, examples, pin out data sheet and even CAD files. This is a really open source.
The New Arduino Nano ESP32: A Faster and More Powerful Board
When it comes to microcontroller boards, Arduino has always been a popular choice among beginners and experienced makers alike. Their boards, such as the Arduino Uno and Arduino Nano, have been widely used in various projects. However, with the rise of the ESP32 microcontroller, many enthusiasts have shifted their focus towards boards based on this powerful chip.
Arduino Uno and Arduino Nano: Perfect for Display-less Projects
While Arduino boards are great for beginners and breadboard projects, they do have their limitations. One of the main drawbacks is their limited speed and memory capacity. As a result, some makers, including myself, have found boards based on the esp32 chip to be more suitable for their needs especially projects that require a display.
Introducing the Arduino Nano ESP32
Recently, Arduino reached out to me and offered to let me try their latest development board the Arduino Nano ESP32. I gladly accepted their offer and was pleasantly surprised when the package arrived a few days later.
The Arduino Nano ESP32 is the first Arduino board to be based on the esp32 microcontroller. This new board boasts impressive performance, with a clock speed of 240 megahertz compared to the 16 megahertz of the previous Nano. Additionally, it offers more memory and has built-in Wi-Fi and Bluetooth capabilities just like other boards based on the esp32.
Furthermore, the Arduino Nano ESP32 retains the same compact size and pin layout as its predecessor, making it convenient for breadboard projects and compatible with existing setups.
Testing the Arduino Nano ESP32
Curious to see how the Arduino Nano ESP32 performs, I put it to the test. I was amazed by its speed and responsiveness tasks that used to take a considerable amount of time on the older Nano were now completed in a blink of an eye. The increased clock speed of 240 megahertz truly makes a difference in terms of performance.
In addition to its improved speed, the Arduino Nano ESP32 also offers ample memory, which is crucial for projects that require data storage or complex algorithms.
Sharing My Code and
If you’re interested in seeing the code I used to test the Arduino Nano ESP32, I will be sharing it on my website. The code showcases the capabilities of this new board and demonstrates its compatibility with various sensors and components.
Overall, the Arduino Nano ESP32 is a game-changer in the world of microcontroller boards. Its impressive speed, increased memory capacity, and built-in Wi-Fi and Bluetooth make it a worthy successor to the previous Arduino Nano. Whether you’re a beginner or an experienced maker, the Arduino Nano ESP32 is definitely worth considering for your next project.
Testing the Arduino Nano ESP32
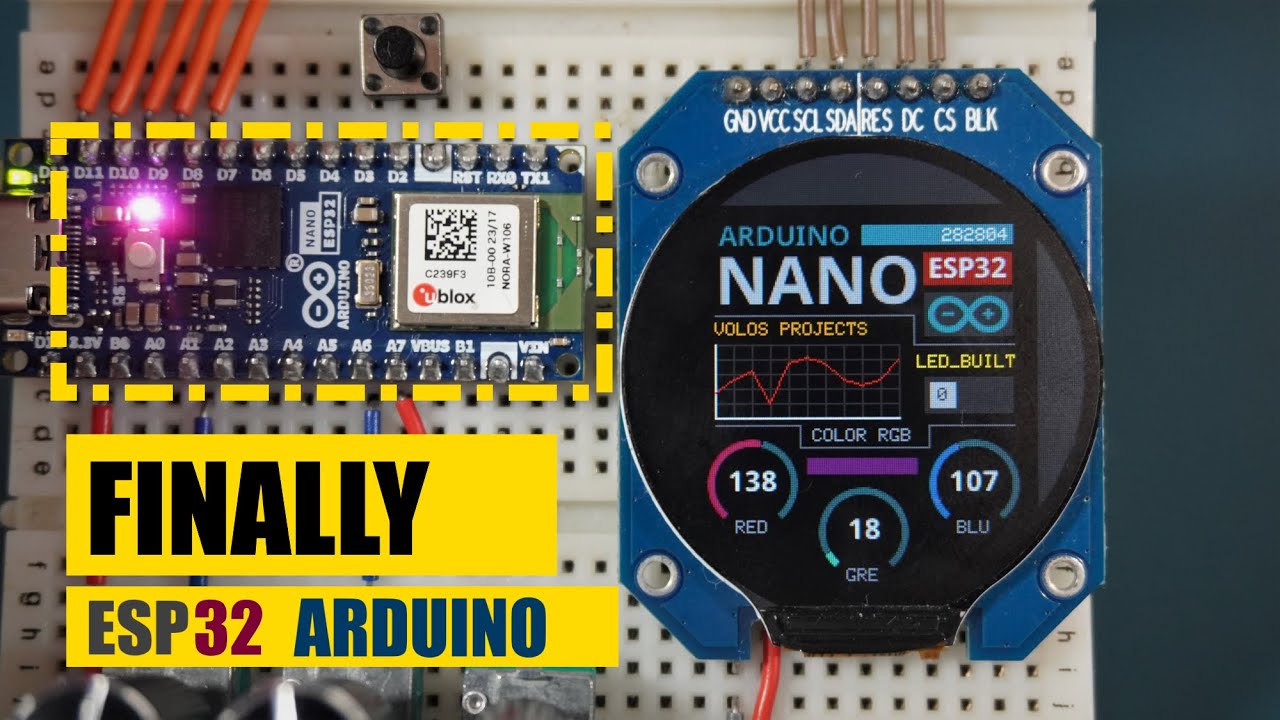
When I received the Arduino Nano ESP32, I pondered for a while about what project to undertake. Eventually, I decided to add a display and couple potentiometers to create a user interface for selecting the desired color for the RGB LED. This project not only served the purpose of controlling the RGB LED but also allowed me to assess the speed and ease of use of the board.
Speed and Performance
After several hours of work, I successfully controlled the RGB LED using the Arduino Nano ESP32. However, the main objective was not solely to control the RGB LED. Instead, I wanted to test the speed and performance of the board. To my satisfaction, the Arduino Nano ESP32 proved to be fast, with ample memory and excellent usability, largely due to the comprehensive documentation provided on the Arduino website.
Project Showcase
Allow me to present my masterpiece. I have integrated three potentiometers into the board – one for adjusting the amount of red, another for green, and the last one for blue. The chosen color is displayed on the screen and reflected in the RGB LED. Additionally, there is a push button to turn on or off the built-in LED. The random value graph displayed on the board helps assess the speed of the Arduino Nano ESP32. The code for this project can be found in the description, which you can freely modify as per your requirements.
Easy Installation
It is really easy to install this board in Arduino IDE using board manager, but you dont even need to install it. It can be used as esp32s3 development module, but in that case you will use these numbers for pins.
Perfect Size for Breadboard Projects
The best feature of this board is its size. Arduino Nano was always my favorite for breadboard projects, and now I finally have an esp32 board with enough pins to use on my breadboard. I’m happy with their decision to try something with the esp32 microcontroller.
Recommendation
I, like this board a lot and I can recommend it with no problem. Feel free to leave a comment and tell me what you think. Do you use Arduino boards? And, like always, if you are a first time here, feel free to subscribe.
Support
If you want, you can support my work. You can buy me coffee, and the link is in the description.
The Arduino Nano ESP32 proves to be a versatile and powerful development board. Its integration of the ESP32 MCU, RGB LED, and convenient user interface make it a great choice for a wide range of projects. Whether you are a beginner or an experienced Arduino user, the Arduino Nano ESP32 is worth considering for your next project.


