


Using the u8g2 Library
The u8g2 library is an open source library that provides a wide range of functions for displaying text, images, and other graphical elements on OLED displays. It supports a variety of displays, including the SSD1306, IIC, and SSD1309. The library is compatible with the Arduino Uno and other Arduino boards.
Creating a Custom Font
Creating a custom font for an OLED display is a relatively straightforward process. The u8g2 library includes a variety of fonts, but if you want to create your own font, you can do so using the u8g2 font converter. This tool allows you to create a custom font from any TrueType or OpenType font file. Once the font is created, it can be used in the u8g2 library.
Using the Custom Font
Once you have created your custom font, you can use it in your sketch. To do this, you need to include the font file in your sketch. You can then use the u8g2 librarys drawString() function to draw the text using the custom font. The drawString() function takes two parameters: the text to be drawn and the font to be used. For example, to draw the text Hello World using the custom font u8g2_font_t022b_tf, you would use the following code:
U8g2.drawString(0, 10, “Hello World”);
U8g2.setFont(u8g2_font_t022b_tf);
Using u8g2 Library
The u8g2 library is a powerful tool for creating custom fonts for Arduino OLED displays. It provides a comprehensive set of functions for displaying text and graphics on OLED screens. It is easy to use and requires minimal coding knowledge. To get started, you will need to install the u8g2 library in the Arduino IDE. Once installed, you can create custom fonts by using the u8g2 library functions.
Creating a Custom Font
Creating a custom font for an Arduino OLED display is a relatively simple process. First, you need to create the font in a bitmap application such as Phony. This application allows you to draw characters and preview them on the left side. You can also import existing fonts by using the True Type font option. Once you have created the font, you need to export it in the PDF file format.
Generating Font Data
Once you have exported the font in the PDF file format, you can use an iterator to generate the data. This data needs to be copied into the sketch. The u8g2 library provides a comprehensive set of functions for generating font data. These functions include functions for generating font data from a bitmap, from a vector, from a True Type font, and from a PDF file.
Adding the Font to the Sketch
Once you have generated the font data, you need to add it to the sketch. This can be done by using the u8g2 library functions. The u8g2 library provides functions for adding fonts to the sketch. These functions include functions for adding fonts from a bitmap, from a vector, from a True Type font, and from a PDF file.
Testing the Font
Once you have added the font to the sketch, you can test it by running the sketch. The u8g2 library provides a comprehensive set of functions for testing fonts. These functions include functions for testing fonts from a bitmap, from a vector, from a True Type font, and from a PDF file. Once you have tested the font, you can use it in your project.
Using the Font in Your Project
Once you have tested the font, you can use it in your project. The u8g2 library provides a comprehensive set of functions for using fonts in projects. These functions include functions for displaying text, for displaying graphics, and for displaying images. With these functions, you can create custom fonts for your Arduino OLED display and use them in your project.
So I will open the command prompt and navigate to the folder where I have the PDF conf.exe and the PDF file.
Using u8g2 Library
The u8g2 library is a popular library for displaying custom fonts on Arduino OLED displays. It is an open source library and supports a wide range of displays and controllers. To use the library, one needs to include the header files and then call the u8g2_init() function. After that, one can use the u8g2_draw_string() function to draw custom fonts on the display.
SSD1306, IIC, and SSD1309
The SSD1306, IIC, and SSD1309 are popular controllers used in Arduino OLED displays. These controllers are used to control the display and provide support for custom fonts. The SSD1306 and IIC controllers are used in smaller displays while the SSD1309 is used in larger displays.
UNO
The Arduino UNO is a popular microcontroller board used for creating custom fonts on Arduino OLED displays. It is an open source board and can be programmed using the Arduino IDE. The UNO board is compatible with a wide range of displays and controllers.
Creating Custom Fonts
Creating custom fonts for Arduino OLED displays is a relatively simple process. First, one needs to create a font file using a font editor such as FontForge. After that, the font file needs to be converted to a PDF file using a PDF converter such as Apache FOP. Finally, the PDF file needs to be converted to a font data file using a PDF conf utility. Once the font data file is created, it can be used in the u8g2 library to draw custom fonts on the Arduino OLED display.
Introduction to Arduino OLED Custom Fonts
Arduino OLED custom fonts are a great way to add a unique touch to your project. With the u8g2 library, you can easily create custom fonts for your OLED display. In this tutorial, we will go through the steps of creating a custom font for an Arduino OLED display, using the SSD1306, IIC, SSD1309, and UNO.
Creating the Font File
The first step in creating a custom font is to create the font file. This is done using the bfdconf.exe utility. To access this utility, open the command line and type in bfdconf.exe. This will show you all the different options available. For this tutorial, we will be using the -F1, -M, and -O options.
The -F1 option is used to specify the range of characters to be included in the font. For this tutorial, we will be using characters 32 to 122. The -M option is used to specify the font name. For this tutorial, we will be using Aldo the FH. The -O option is used to specify the output file. For this tutorial, we will be using Aldo.c.
Once the command is entered, the font file will be created. This file should then be pasted into your existing project.
Adding the Font to the u8g2 Library
The next step is to add the font to the u8g2 library. To do this, open the u8g2 library and paste the font file into the folder. Once this is done, you can then select the font from the list of fonts in the library.
Using the Font in Your Project
Once the font is added to the u8g2 library, you can then use it in your project. To do this, you will need to include the u8g2 library in your project. You can then use the u8g2.drawStr() function to draw the text on the OLED display.
So what I did is I created a smaller version of those fonts and I called it audio.
Using u8g2 Library for Arduino OLED Custom Fonts
The u8g2 library is a powerful tool for creating custom fonts for Arduino OLED displays. It allows users to create fonts of any size and shape, and can be used to create fonts for a variety of applications, such as smart watches, digital clocks, and more. This tutorial will show you how to use the u8g2 library to create custom fonts for your Arduino OLED display.
Creating a Font with u8g2
The first step in creating a custom font with u8g2 is to create a font file. This can be done by importing a font from a file, such as a TrueType font file, or by creating a font from scratch. Once the font is imported or created, it can be exported as a PDF file format, which will generate a C file containing the font data. This C file can then be copied into the sketch.
Using the Font in the Sketch
Once the font data has been copied into the sketch, it can be used to write text to the display. This is done by using the setFont() function, which takes the font data as an argument. The font data can then be used to write text to the display using the write() function.
Tweaking the Font
Once the font has been written to the display, it may need to be tweaked in order to achieve the desired look. This can be done by adjusting the font size, as well as the spacing between characters. Additionally, the vertical position of the text can be adjusted by using the setFontPosTop() function.
Creating a Smaller Font
In some cases, it may be necessary to create a smaller font in order to fit the text on the display. This can be done by creating a smaller version of the font, which can be done by reducing the size of the font or by removing some of the characters. Once the smaller font has been created, it can be used in the same way as the larger font.
Creating Custom Fonts for Arduino OLED
Creating custom fonts for Arduino OLED displays can be a daunting task, but with the right tools and knowledge, it can be done with relative ease. The u8g2 library is a popular choice for Arduino users, as it supports a wide range of displays and controllers. It also provides a comprehensive set of functions for manipulating fonts and graphics. This tutorial will walk you through the steps of creating a custom font for your Arduino OLED display.
Resizing the Font Image
The first step is to resize the font image to the desired size. This can be done by opening the image in an image editor and using the “Image Size” option. Set the size to 50 and the resampling to “Nearest Neighbor” to keep the hard edges. Once the image is resized, save it as a PNG file.
Creating a New Font
The next step is to create a new font in the image editor. Go to “File” and select “New” and set the height to 50 pixels, as well as the ascent. This will create a new font with the desired size.
Resizing the Font
The font will need to be resized to fit the OLED display. Go to “View” and select “Resize” and add 11 pixels horizontally. This will make the width of each digit 20 pixels, which is the desired size for the OLED display.
Importing the Image
Once the font is resized, the image can be imported into the image editor. Go to “File” and select “Import from Bitmap” and select the image. In the dialog box, type in the string of digits (0-9) and select the color (white). Click the “Grab Glyphs” button and the “Done” button and the individual digits should be placed in the font.
Exporting the Font
The final step is to export the font in a PDF file format and then convert it into a C file. This can be done by going to “File” and selecting “Export as PDF”. Once the PDF is created, it can be converted into a C file using a conversion tool.
Creating custom fonts for Arduino OLED displays is a relatively simple process, once you understand the steps involved. With the right tools and knowledge, anyone can create custom fonts for their Arduino OLED display.
96 inches and then I have the 1.3 inches and then I have the 1.5 inches and then I have the two inches and then I have the 2.4 inches.
Using U8G2 Library for Arduino OLED Custom Fonts
The U8G2 library is a powerful tool for creating custom fonts on Arduino OLED displays. This tutorial will walk through the steps of setting up the library, connecting the display to an Arduino board, and displaying custom fonts.
Installing the U8G2 Library
The first step in creating custom fonts is to install the U8G2 library. This can be done by searching for the library in the Arduino IDE library manager. Once the library is installed, it can be used to create custom fonts.
Creating the Font
The next step is to create the font. This can be done by creating a C file and then pasting the content into the sketch. The font should be set to a size of 50 pixels and moved down to make the digits more visible.
Uploading the Code to the Arduino Board
Once the font is created, the code needs to be uploaded to the Arduino board. This can be done by copying the code into the Arduino IDE and selecting the correct board. For this tutorial, the board used is the Arduino Uno.
Connecting the Display to the Arduino Board
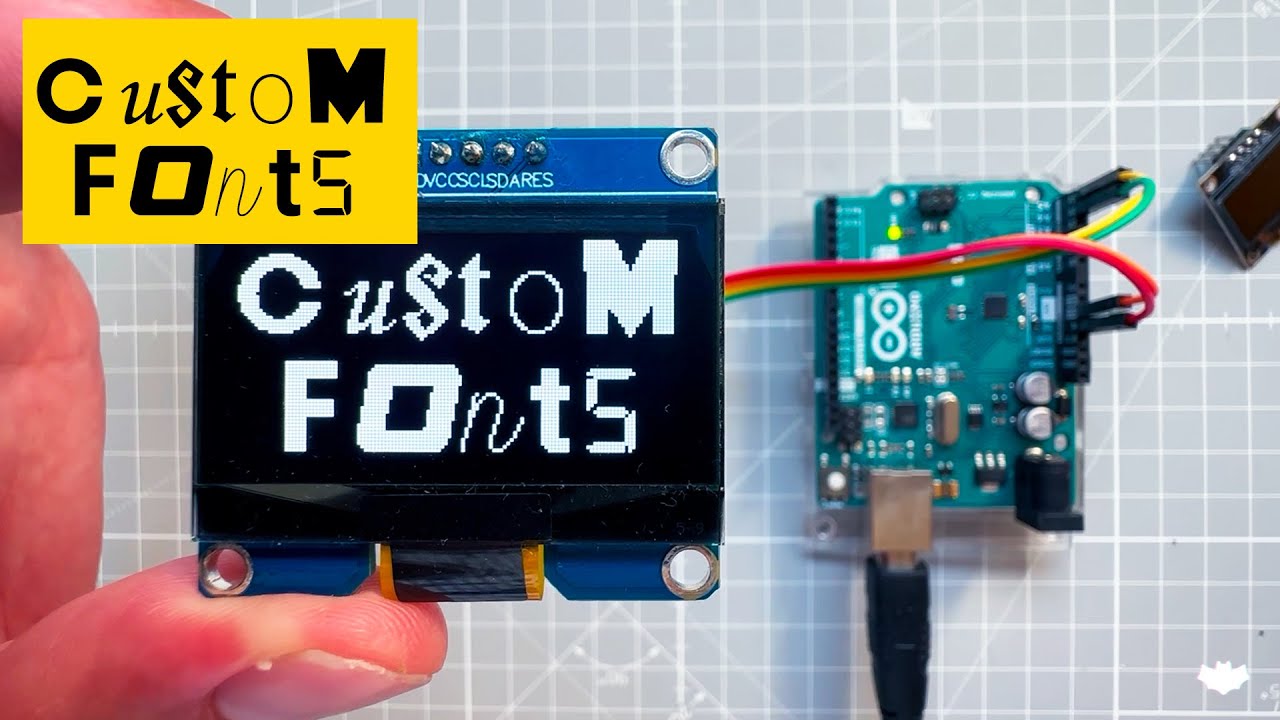
The next step is to connect the display to the Arduino board. This is done by connecting the ground to ground, the VCC to 5 volts, the SDA (serial data) to pin SDA or pin A4, and the SCL (serial clock) to pin SCL or pin A5.
Displaying the Font on the Display
Once everything is connected and the Arduino board is powered up, the custom font should be displayed on the display. The size of the display used in this tutorial ranges from 0.96 inches to 2.4 inches.
Overview of OLED Displays
OLED (Organic Light Emitting Diode) displays are a type of display technology that is becoming increasingly popular due to its thin form factor, low power consumption, and wide viewing angle. OLED displays are available in a variety of sizes, ranging from small 0.96 inch displays to larger 9 inch displays. OLED displays are also available in different colors, such as white, blue, yellow, and green.
Using the u8g2 Library for Custom Fonts
The u8g2 library is a powerful library for creating custom fonts and graphics on OLED displays. This library is compatible with a wide range of Arduino boards, including the popular UNO board. The library supports a variety of display controllers, including the SSD1306, SSD1309, IIC, and I2C.
Creating Custom Fonts with the u8g2 Library
Creating custom fonts with the u8g2 library is relatively straightforward. First, the library must be installed on the Arduino board. Once the library is installed, the user can create a custom font by specifying the font size, typeface, and character set. The library also allows users to create custom digits by specifying the width and height of each digit.
Using the Shield to Display Custom Fonts
Once the custom font is created, it can be used to display text on an OLED display. To do this, the user must connect the OLED display to the Arduino board using a shield. The shield allows the user to connect multiple OLED displays to the board, allowing them to display different fonts on each display.
Creating custom fonts for OLED displays is a relatively simple process. With the u8g2 library and the u8g2 font converter, you can create custom fonts for your OLED displays. Once the font is created, you can use the u8g2 librarys drawString() function to draw the text using the custom font.
Creating custom fonts for Arduino OLED displays is a great way to add a unique touch to your project. With the u8g2 library, you can easily create custom fonts for your OLED display. In this tutorial, we have gone through the steps of creating a custom font for an Arduino OLED display, using the SSD1306, IIC, SSD1309, and UNO.
The u8g2 library is a powerful tool for creating custom fonts for Arduino OLED displays. It allows users to create fonts of any size and shape, and can be used to create fonts for a variety of applications. Additionally, the font can be tweaked in order to achieve the desired look, and a smaller version of the font can be created in order to fit the text on the display.
Creating custom fonts with the u8g2 library is a great way to add a unique look to an OLED display. The library is easy to use and allows users to create custom fonts with a variety of font sizes, typefaces, and character sets. Additionally, the shield allows users to connect multiple OLED displays to the Arduino board, allowing them to display different fonts on each display.


