


The New Arduino Giga R1 WiFi (Part 1) #arduino #gigar1wifi
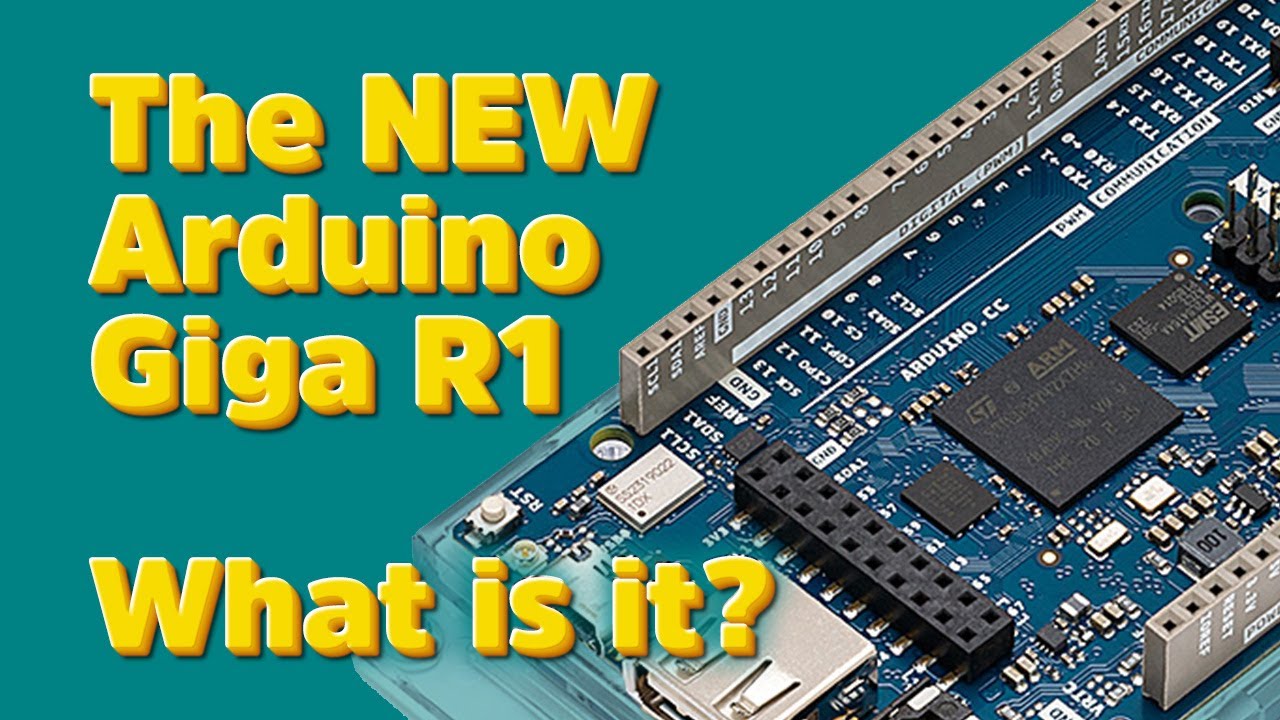
. Those of you whove watched my videos for some time know Im an avid user of Arduino boards in many of my projects. Ive made everything from a YouTube subscription counter to gamepads and even a talking head. Thats. Why Im super excited about this new board, which Arduino just released the Arduino Giga.? So lets take a brief moment and look closer at what this board can do and in the next video Ill go through building a project with the Giga. Stick around, because this board is a literal beast Alright, so we have a new Arduino board. Those get released more or less all the time. What makes this one so special While its true that Arduino has relased over 100 hardware products over the years. The Arduino Giga brings both a lot of processing power, a lot of memory, connectivity and other functionality to the ecosystem.. The box itself is basically what youve come to expect by now. Clean design, and you get those ubiquitous stickers that accompany every Arduino board.. The Giga itself should be directly recognizeable by most, while its not an UNO. It shares the footprint of the Arduino Mega and DUE boards.. Those with a keen eye can probably spot quite a few differences that doesnt match up with previous Arduino boards, though, but rather than going through every minute difference to other boards, and there are quite a few, I will focus on the things which excite me the most About the Arduino Giga.
Lets start with whats. Basically, the same you get a bunch of GPIO pins, digital and analog pins. Thats, nothing surprising, though the amount of pins makes me very excited., No more juggling trying to fit everything. I do into the alotted few pins., Oh, who am I kidding Im sure Ill, find a use for all of these as well.. You actually get a whooping 75 digital pins and 12 analog pins, though, depending if you use them for communication or not all, may not be accessible at all times.. Of course, if youve used many pins at once its a decent chance that your sketches also have ballooned in size, perhaps even hitting the memory cap as well., The Arduino Giga has 2MB of internal flash storage for sketches and 16MB of external storage, which can be used As a general storage to store sensor data, for instance, or even to work as a flash drive, so you can store other files to be used by the Giga. As weve touched on the microcontroller lets continue there. The Giga runs on a STM32H747XI microcontroller., Its a dual core chip, which means its capable of running different things on each core in parallell, for instance, MicroPython on one and Arduino code on the other and having them communicate between each other. Continuing on the board. There is one pin which actually makes me unreasonably happy the OFF pin. Now dont get me wrong. Youve always been able to turn off an Arduino by just cutting power, but the ease of just connecting a switch to OFF and seamlessly turn the board on and off is a great feature.
Along those lines. If you need to keep time, the Giga also has a built in Real Time Clock, which means you can keep time very accurate over long periods of time. With the VRTC pin. You can also essentially power down your Arduino, while providing external battery power just for the RTC and having it run, despite the rest of the board being dormant, which is great for lower power implementations.. The microcontroller also contains a 2D graphics accelerator which allows for the creation of touch screen interfaces with resolutions up to 1024×768 pixels.. This definitely means I have to get myself some screens But lets eject from the microcontroller and continue on with the board.. You may notice that there is a 3.5mm audio jack and, if you know me, audio and Arduino is something Ive been experimenting with for some time.. The audio jack works both as an input for microphones, as well as an output with 2 DAC channels., While nothing truly revolutionary. The DAC, as well as the two DAC pins can be configured beyond the default bit depth of 8 bits up to 12 bits, meaning much higher fidelity of the audio output.. Next to the audio jack, we find two USB jacks., While the smaller USB C jack is used for power, programming and communication. The bigger USB A jack is a host only port, meaning that you can connect USB peripherals to it, such as USB keyboards and HID peripherals.. Needless to say, together with a screen, this could be a very handy combo.
. Now there are two glaring things which I still havent touched upon. There are two big connectors in the middle of the board.. The left connector is a 20 pin. Camera connector compatible with breakout boards from Arducam. The connector on the right sports DSI pins, allowing the connection to the aforementioned screens. Whats really cool about these two connectors, though, is that, while you can use them for cameras and screens, you can also use them to further Build shields which stack both on top and below the Giga. With enough passthroughs, you could essentially build a large sandwich of boards with the Giga as the meat in the middle.. These things are: what excites me the most and youre bound to see it in projects in the near future.. Of course, there are more features of the Giga, mainly around communication and debugging, but youll have to dig into the product information yourself to explore. Those.. If you want to check out the Arduino Giga closer and maybe even get one or a dozen yourself head on over to the arduino.cc webpage and check it out, Thats all for this time around, but be sure to check out part 2 when it drops. If you want to see more of the Arduino Giga.


